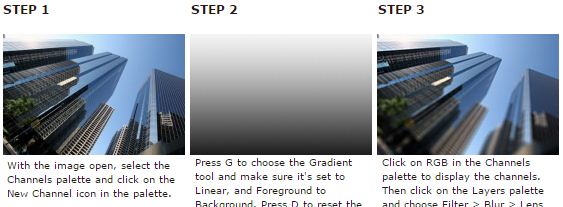
Sebuah cara yang bagus untuk menarik mata pembaca adalah dengan menggunakan depth of field. Efek ini secara tradisional dibuat pada saat pemotretan, tetapi anda juga bisa menggunakan Photoshop dengan menggunakan Lens Blur bersama dengan channels. Dalam contoh ini kami menambahkan selective focus untuk foto gedung pencakar langit.
Step 1

With the image open, select the Channels palette and click on the New Channel icon in the palette.
Step 2

Press G to choose the Gradient tool and make sure it’s set to Linear, and Foreground to Background. Press D to reset the foreground and background colors. The gradient preview area in the Options Bar should be showing a black to white gradient. Press X if necessary to swap the colors. Click and drag vertically in the image window to create a gradient.
Step 3
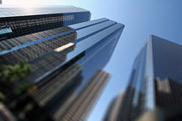
Click on RGB in the Channels palette to display the channels. Then click on the Layers palette and choose Filter > Blur > Lens Blur. Choose Alpha1 from the drop-down Source menu. Now simply drag the Blur Focal Distance slider to control the part of the image that’s in focus, then click on OK when you’re done. In the example above we set the sharpest point to be the top of the middle tower.
